Debugging Android app launch by setting debug app
Recently, I had to debug a deeplink problem that happens only on fresh app start-up. I was particularly
interested in seeing what was happening at different parts of the app when the app
starts up. Naturally, I put Log.d() statements allover the app,
but it wasted a lot of my time. Every time I added a new log statement, I had to rebuild
the app.
In this short mini-blog, I’m going to share something I learned from a colleague - how to set a debug app and what it means.
How can I set a debug app?
A “debug app” is the app that you want to debug.
When you set a debug app, the app is not launched until a debugger is attached. On launching the app, you see a dialog with “Waiting for Debugger” as its title. An example of the dialog is as shown in the screenshot below.

By the time you see this dialog, you can (set break up points and) attach your debugger, then the app launch will resume.
There are two ways you can set your debug app - via the developer options in your device settings or via an adb command.
Setting debug app from developer options
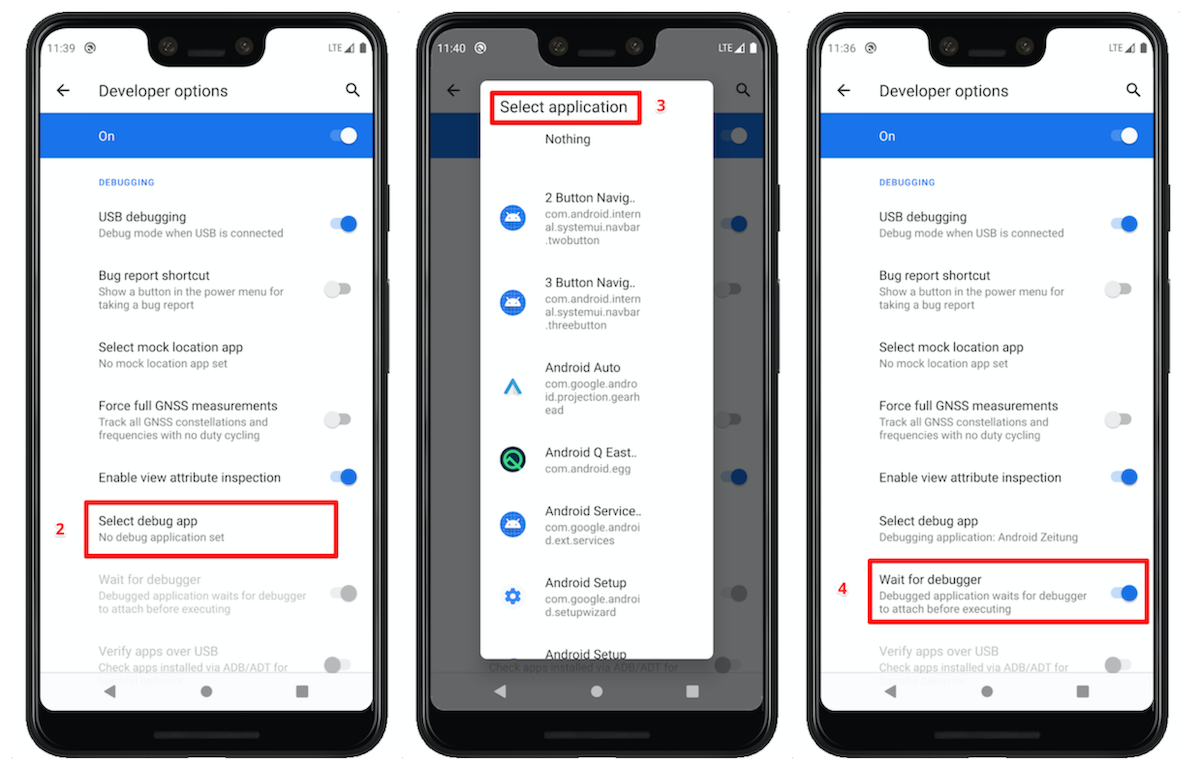
You can set the debug app and configure other options via the UI in developer options. To set it up:
- Navigate to
Settings -> System -> Developer optionsand then scroll to theDebuggingsection. - Click on “Select debug app”.
- Select the application you want to debug from the list.
- Check the
"Wait for debugger"option - this is what activates the behaviour we want where the debugged application waits for the debugger to attach before launching.
The screenshots below show the step 2-4:
And with that, you have set your app as the debug app.
To clear the debug app, you can deselect your app by selecting the “Nothing” option when you get to step 3 above.
Setting debug app from adb
It is also possible to set the debug app from adb. I personally find this option quicker and more convenient than the other approach, but that’s just me.
The feature is available via the set-debug-app adb command. Typical usage is:
adb shell am set-debug-app -w --persistent <your app package goes here>
As seen from the adb docs page:
-wflag is what sets the “wait for debugger” option (like we did with the UI)--persistentflag is what tells the system to save this, and not treat as a one-off action
To clear the debug app via adb, you can use this command:
adb shell am clear-debug-app
Bonus - set up command line aliases
The commands are pretty long, so I wrote aliases that helped me shorten them. The aliases on Mac and Linux operating systems look like this:
alias debug='adb shell am set-debug-app -w --persistent'
alias cleardebug='adb shell am clear-debug-app'
Usage of the alias makes it really, clean and convenient:
debug <your app package>
cleardebug
Conclusion
I find setting debug app really handy when debugging app start-up problems. For example, if you want to debug
some code that you have in your Application class’ onCreate() method, like the initialization of some important classes or SDKs you have in your app.
Do you also have some nice debugging tips you use when developing for Android? Please feel free to share them in the comments.
Thanks for reading,
Cheers!